Handling Heavy-lifting Job Using Thread Pooling

Your java app server such as Tomcat, JBoss, Websphere and Glassfish are multithreaded — meaning if a user opens a web page (HTTP request submitted), the app server will try to find a free unused thread, and allocate the job of serving the request to it.

One common problem which I recently come accross is when the user performs a long-running task such as reporting or data transformation. If you just simply allow a user to execute a long-running task, your app server is vulnerable to thread starvation — that is genuine user load, or even hackers can issue a massive amount of request causing your server to run out of free threads — hence denying application availability.

One approach is to implement a resource bounding pattern such as thread pooling. The analogy of this pattern is similar like a chef in a restaurant. Say if there is 2 chefs on a restaurant, and each one of them needs 10 minutes to cook an order. Each next free chef will take the order in the order that it arrives, and if all two of them are busy, subsequent order will be queued .

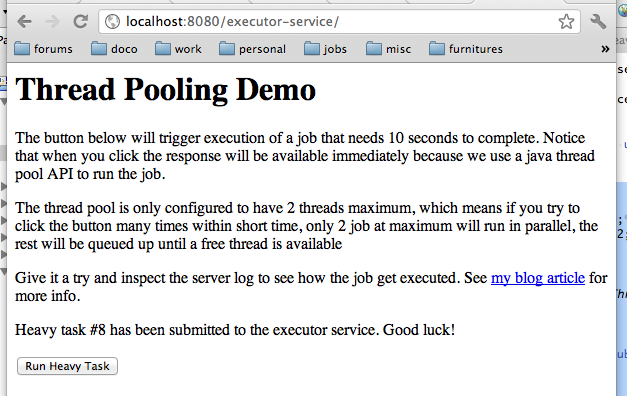
To illustrate this with an example, following is a class that represent a long-running task. Here the task is simply performing 10 seconds delay to simulate the long-run. A log message with task id and the name of the thread running the task is printed when the task begins and ends.

[sourcecode language="java"]
public class HeavyTask implements Runnable {
private static Logger logger = LoggerFactory.getLogger(HeavyTask.class);
private int taskId;

public HeavyTask(int taskId) {
this.taskId = taskId;
}

public void run() {
logger.info(String.format("Task #%s is starting on thread %s…", taskId, Thread.currentThread().getName()));

try {
Thread.sleep(10 * 1000);
} catch (InterruptedException e) {
logger.error(String.format("Task #%s running on thread %s is interrupted", taskId, Thread.currentThread().getName()), e);
}

logger.info(String.format("Task #%s on thread %s finished", taskId, Thread.currentThread().getName()));
}
}
[/sourcecode]

Secondly we have the HeavyTaskRunner class which is a service class that implements business functionality. This class also instantiates the thread pool using Java ExecutorService API with 2 maximum threads by using Executors.newFixedThreadPools() factory method.

[sourcecode language="java"]

public class HeavyTaskRunner {
private ExecutorService executorService;
private static final int NUM_THREADS = 2;
private int taskCounter = 0;

public HeavyTaskRunner() {
executorService = Executors.newFixedThreadPool(NUM_THREADS);
}

/**
* Create a new { HeavyTask} and submit it to thread pool for execution
*/
public int runTask() {
int nextTaskId;
synchronized(this) {
nextTaskId = taskCounter++;
}
executorService.submit(new HeavyTask(nextTaskId));
return nextTaskId;
}
}
[/sourcecode]

And finally I wrapped this in a nice simple Spring MVC web application. You can download the source code from my google code site and run embedded tomcat container using mvn tomcat:run command.

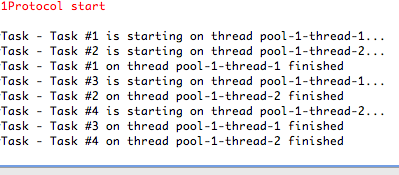
If you look at the server log, this is what it prints after 4 tasks were run in less than 10 seconds. Notice that not more than 2 tasks ever run simultaneously. If all threads are busy the task will be queued until one become free:

This techniques is ofcourse not without downside. Although we have capped the thread (an memory) resource into certain limit, the queue can still grow infinitely, hence our application is still vulnerable to denial of service attack (if a hacker submitted long running tasks for a thousand time, the queue will grow very big causing service unavailability to genuine users)

The concurrency chapter of Java SE tutorial is a good reference if you want to dig more into other techniques of managing threads and long running tasks.

Demo Application Source Code

Source code for the demo application above is available for browsing / checkout via Google Code hosting:

  • Browse: 
  • Checkout:

Ensure you have latest version of JDK and Maven installed. You can run the application using embedded tomcat with mvn tomcat:run command from your shell.
When Your JVM Crashes With OutOfMemoryError

Getting OutOfMemoryError: java heap space is probably one of the most annoying thing to happen to your application server. As application gets more complex and your boss keep pushing you to implement new functionality faster, it’s easy to forget about heap consumption efficiency

Fortunately there are few things you can do to analyze the root cause, and attempt to solve the issue. I stumbled upon a little useful JVM option -XX:+HeapDumpOnOutOfMemoryError when digging Oracle Hotspot VM documentation. What this option will do is to generate a heap dump file something like java_pid1234.hprof right before the java process terminates. You can then load this file into an analysis tool like jvisualvm to have a look at what’s going on.

Let’s give this a go!

Let’s write a tiny little program that leaks a huge amount of memory (let’s hope none of your programmer colleague does anything like this)

[sourcecode language="java"]
public class LittleLeaker {

/**
* A little piece of program that leaks a lot of memory
*/
public static void main(String[] args) {
ArrayList array = new ArrayList();

while (true) {
array.add("Let’s leak some memory here");
}
}

}
[/sourcecode]

Compile it, and run the code with following command

[sourcecode language="text"]
java -XX:-HeapDumpOnOutOfMemoryError LittleLeaker
[/sourcecode]

You shouldn’t have to wait too long until your VM gave up and throw OutOfMemoryError. When it does, notice the hprof file that got created:

[sourcecode language="text"]
192-168-1-3:bin gerrytan$ java -XX:+HeapDumpOnOutOfMemoryError LittleLeaker
java.lang.OutOfMemoryError: Java heap space
Dumping heap to java_pid280.hprof …
Heap dump file created [92624139 bytes in 0.306 secs]
Exception in thread "main" java.lang.OutOfMemoryError: Java heap space
at java.util.Arrays.copyOf(Arrays.java:2760)
at java.util.Arrays.copyOf(Arrays.java:2734)
at java.util.ArrayList.ensureCapacity(ArrayList.java:167)
at java.util.ArrayList.add(ArrayList.java:351)
at LittleLeaker.main(LittleLeaker.java:28)
[/sourcecode]

Let’s Analyze The Heap Dump File

  1. Make sure you have the latest JDK installed and configured on your PATH environment variable. Run jvisualvm program on command line. If this is the first time you’re running it, it might perform some calibration first.
  2. Load the hprof file by using the menu File -> Load. Select the file format to “Heap Dumps” and point to the path of the hprof file generated earlier
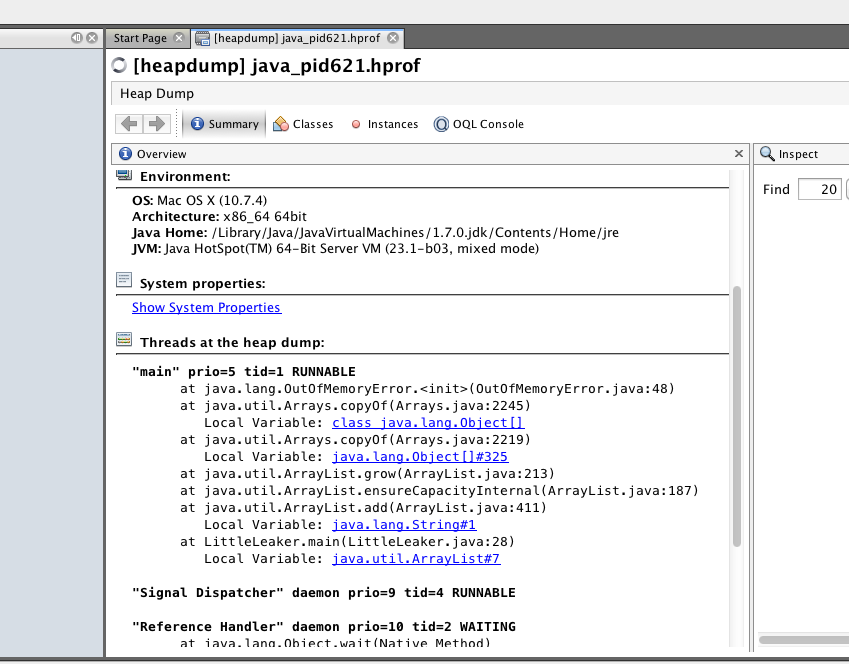
  3. Once loaded, you can see some basic information like when was the dump taken, environment properties, system properties, but most importantly the Threads at the heap dump section. Click the Show Threads link underneath it

    Recall that your virtual machine is a multithreaded environment. In our case, since it’s just a very simple app, you would be interested in the “main”thread.You can trace down in the main thread stack trace the culprit of the OOME.You might be thinking this is not so cool because you’ve already seen the stack trace from the console anyway. But think about if this were your Java EE app server with dozens of threads, getting to know what other threads are doing will be handy
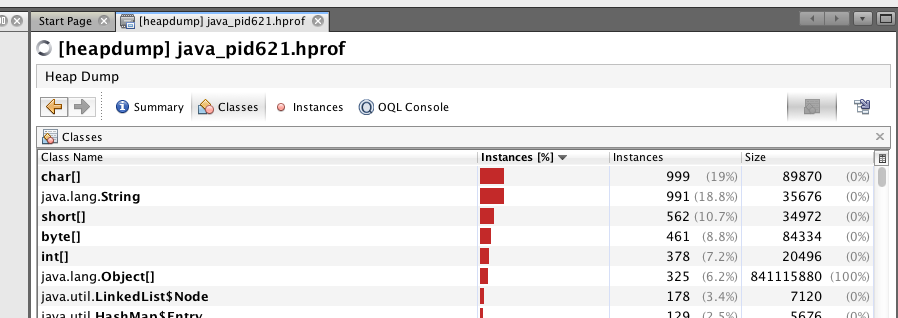
  4. Another interesting analysis to perform is the Classes button at the top. This will show you total number of instances in the heap per classes

    As you can guess, this might not look so interesting since our program is just very simple. But when you have a real ly-complex enterprise application, then this information will be very helpful

There Are Heaps Other Tricks and Techniques

The functionality of Jvisualvm doesn’t stop there. You can also attach it to running JVM to see live monitoring data, obtain thread dump, profiling and plenty others.

This article written by Oracle’s Mandy Chung is a very good reading to deepen your knowledge about java application monitoring.

Mapping JSON Request With Spring MVC

Inspired by , this is a short tutorial on how you can map a request with *.json extension into a JSON view.

This tutorial will demonstrate a small subset of Spring JSON capability using the ‘Spring MVC Project’ template application generated by STS. When you first created a new project from the template, the web app came with a default home page showing ‘Hello World’ and a server time passed via Model attribute.

We will extend this home page a little bit so we can obtain the JSON view. Note that the JSON view will only contain the formatted attributes inside the Model object

By the way, if you haven’t already know — JSON stands for Java Script Object Notation. It’s a textual representation of a Java Script object, and it’s one of the most popular way of transferring information from server to client in modern Ajax application.

Create a new project using a template

  1. Assuming you have SpringSource Tools Suite (STS) installed, create a new project and select Spring Template Project Wizard
  2. Select ‘Spring MVC Project’ from the selection of template, it might prompt you to download if this is the first time you’re using it
  3. Enter a project name and top-level package and hit ‘Finish’

Change the view resolver to ContentNegotiatingViewResolver

ContentNegotiatingViewResolver is a unique resolver which will delegate request to another resolver by the requested media types. There are multiple way it can determine the media type, but here we’ll just use the URL extension method (see the javadoc for more).

On the servlet spring beans configuration (servlet-context.xml), replace the default InternalResourceViewResolver with this:

[sourcecode language="xml"]
If the request has an extension .json, always provide MappingJacksonJsonView regardless –>


[/sourcecode]

In the example above, we define request with the extension “.*json” into “application/json” media type. Normal request is set to “text/html” by the browser by default. When a request came, the list of view resolvers on the “viewResolver” property will be consulted, and if it supports the requested  media type, that view resolver will be used.

The “defaultViews” property specifies the view that will be override the ones provided by matching resolvers (even if none matches) — regardless of the view name returned by the controller. This however only hold true if the View supports the requested media type.

For example, if “/home” path is requested with Accept header “text/html”, ContentNegotiatingViewResolver will set the media type to “text/html”, consult InternalResoursceViewResolver bean (which supports text/html) and use it. If “/home.json” path is requested, the media type is set to “application/json” (not supported by InternalResourceViewResolver), and since the specified default view MappingJacksonJsonView supports it, it will be used. This is sufficient for common usage because all JSON view can be rendered in the same fashion

Have a look at for more info.

Change the Controller mapping

STS Spring MVC new project template mapped the MainController into “/”, however for our demonstration purpose, let’s map it to “/home”, so we can compare the different media type easily.

[sourcecode language="java"]
/**
* Handles requests for the application home page.
*/

public class HomeController {

private static final Logger logger = LoggerFactory.getLogger(HomeController.class);

/**
* Simply selects the home view to render by returning its name.
*/
(value = "/home", method = RequestMethod.GET)
public String home(Locale locale, Model model) {
logger.info("Welcome home! the client locale is "+ locale.toString());

Date date = new Date();
DateFormat dateFormat = DateFormat.getDateTimeInstance(DateFormat.LONG, DateFormat.LONG, locale);

String formattedDate = dateFormat.format(date);

model.addAttribute("serverTime", formattedDate );

return "home";
}

}
[/sourcecode]

Add Jackson dependency to your classpath

The MappingJacksonJsonView requires Jackson library in your classpath. This library will help you to transform java objects into JSON representation. Add the following dependency to your pom.xml

[sourcecode language="xml"]

org.codehaus.jackson
jackson-mapper-lgpl
1.2.1

[/sourcecode]

Ready to go

Fire up embedded tomcat using mvn package tomcat:run goals, and:

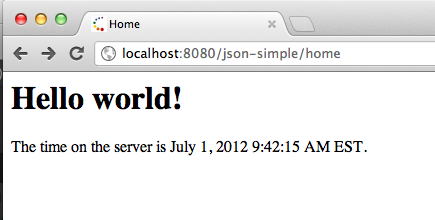
  1. Point your browser to http://localhost:8080/json-simple/home. Inspect you are getting the normal hello world page with server time
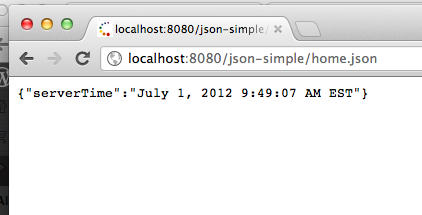
  2. Point your browser to http://localhost:8080/json-simple/home.json. Inspect you are getting the json representation of the model object

The sourcecode for this tutorial is available:

  • For browsing: http://code.google.com/p/gerrytan/source/browse/#svn%2Ftrunk%2Fjson-simple
  • For checkout: /json-simple