Setup IMAP on Exchange Server 2013

Turn On IMAP Services

On the windows server where exchange runs, ensure Microsoft Exchange IMAP4 and Microsoft Exchange IMAP4 Backend started and set the mode to automatic.

imap-svc

Setup Firewall / NAT Port Forwarding On The Router

By default IMAP listens to port 143 and 993 (SSL), the idea here is by setting up port forwarding, packets that hits your office IP will be translated and forwarded into the exchange server. There are no generic instruction on how to do this as each router type is different, however conceptually you want to setup a rule to this effect:

When a packet arrives to to port 143 and/or 993, translate it into and forward it to port 143 and/or 993

Keep in mind the Windows server has its own firewall so you might need to open the ports there too

Setup DNS Alias

Typically you would want imap.mycompany.com to point to the Windows server that hosts Exchange. This can be achieved by adding a DNS A Record on your internet domain manager (provided by your domain hosting).

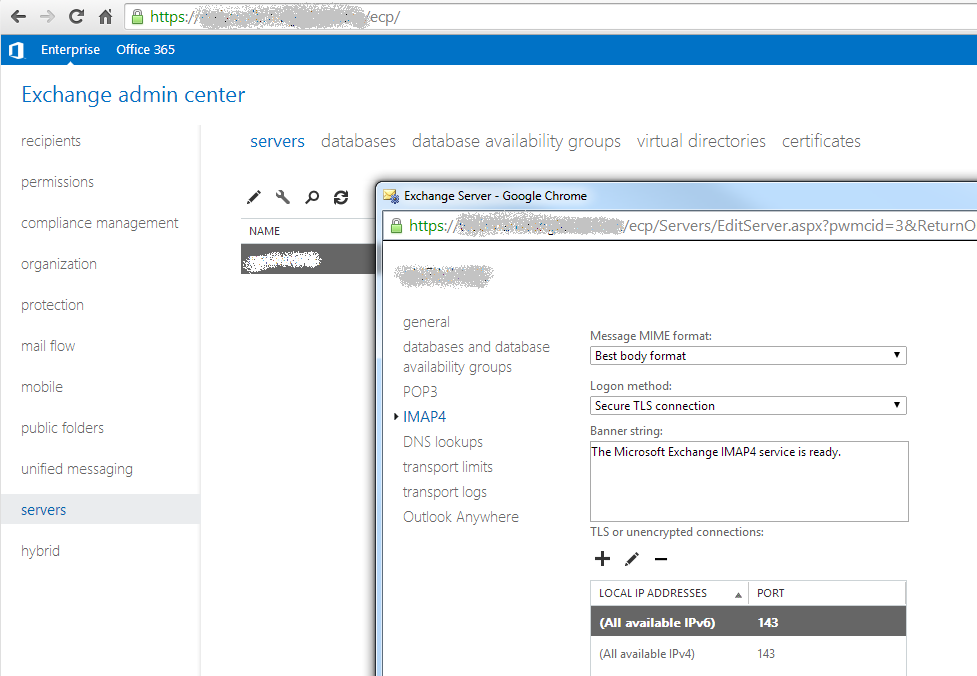
Observe IMAP Settings on Exchange Admin Center (EAC)

Make sure you have it enabled, selected login method to your liking etc:

exchange-eac

And Finally Setup IMAP on Your Phone / Email Client

Depending on your setting, the IMAP details might look like this:

  • IMAP server: imap.mycompany.com
  • Port: 143
  • Enable TLS: true
  • Username:
  • Password:

Javascript Engine in Java

Yes you can create your own javascript engine in Java. This is a cool feature I never knew existed. I don’t know how long it’s been around, I’m guessing Java 6.

Basically, you can do something like this:

import javax.script.ScriptEngine;
import javax.script.ScriptEngineManager;
import javax.script.ScriptException;

public class JavaJS {

  public static void main(String[] args) throws ScriptException {
    ScriptEngineManager manager = new ScriptEngineManager();
    ScriptEngine engine = manager.getEngineByName("JavaScript");
    String script = 
        "function sayHello(name) {"
      + "  print('Hello ' + name);"
      + "}"
      + "sayHello('tom');";
    engine.eval(script);
  }

}

And it will print Hello tom.

You can even mix and match Java and Javascript, here’s how to have Java calling the Javascript function above:

Invocable invocable = (Invocable) engine;
invocable.invokeFunction("sayHello", "Jim");

Cool eh? Read more about this on the Oracle’s Java Scripting Programmer Guide or google JSR-223.

Unit Testing Using In-Memory MySQL Database On Spring

Well the title lied, there’s no such thing as in-memory MySQL database (or at least I won’t be using it for this article). Instead I will use H2 in-memory database setup to run in “MySQL mode”


(thanks to joensson for sharing this technique on SO)

If your app just uses plain jdbc then adding above datasource to your test context would be sufficient, but if you use JPA/Hibernate the cost of table setup, scanning etc could be quite significant.

To overcome this you can split the test context using y annotation.

In the example below I have unit tests for two DAOs: AccountDAOTest and CustomerDAOTest:

y({
  ation("/test-root-context.xml"),
  ation("AccountDAOTest-context.xml")
})
(SpringJUnit4ClassRunner.class)
public class AccountDAOTest {
}
y({
  ation("/test-root-context.xml"),
  ation("CustomerDAOTest-context.xml")
})
(SpringJUnit4ClassRunner.class)
public class CustomerDAOTest {
}

By doing this Spring test-root-context.xml will be setup once and reused accross all unit tests. Only put components common to all tests in test-root-context.xml. In my case I put the following:

  • DataSource
  • EntityManagerFactory
  • TransactionManager


All test specific components go into their respective context.

Don’t forget to add if your DAO uses it. This can’t be placed on test-root-context.xml because I don’t scan all my DAOs there.

And lastly — ofcourse — you need to make sure your pom.xml has dependency to spring-test, junit and h2


  com.h2database
  h2
  1.3.176
  test


  org.springframework
  spring-test
  ${org.springframework-version}
  test


  junit
  junit
  4.7
  test

Using Custom Role Populator On Spring Security LDAP

Here’s how you can use Spring Security LDAP just for password authentication, but use your own database for assigning role / authorities.

First on your context xml define an LDAP server context bean as per normal:


Then define LDAPAuthenticationProvider bean:


If you noticed at the bottom we set authoritiesPopulator into myLDAPAuthPopulator bean which we’ll define next. This is where you can lookup your database using jdbc or other method to populate the roles given an authenticated username:

("myLDAPAuthPopulator")
public class MyLdapAuthoritiesPopulator implements LdapAuthoritiesPopulator {

  
  public Collection extends GrantedAuthority> getGrantedAuthorities(DirContextOperations userData, String username) {
    List authorities = new ArrayList();
    User user = userDAO.findByUsername(username);
    for(String role : user.getRoles()) {
      authorities.add(new SimpleGrantedAuthority(role));
    }
    return authorities;
  }

}

And finally register this authentication provider in the authentication manager: