Using BeanUtils Reflection to Print HTML Table Without Hardcoding the Column

Apache Commons BeanUtils is a little (very) useful library you can use to perform metadata reflection work on the runtime. To use it with Maven, add following dependency (check http://search.maven.org for latest version)


  commons-beanutils
  commons-beanutils
  1.8.3

Supposed you have a simple domain class that represent a user with 3 properties (name, age, weight) like this

public class User {
        private String name;
        private int age;
        private int weight;
        
        /* Getters & Setters */
}

You can get all the name of the properties on the runtime simply by using describe method of BeanUtils

User u = new User();
Map props = BeanUtils.describe(u);

// Below will print [weight, name, age, class]
System.out.println(props.keySet());

Which means.. you can use BeanUtils to introspect your property names and do useful stuff .. eg: printing HTML table without even hardcoding the column

// Print headings
sb.append("");
for(String prop : props) {
  if(prop.equals("class")) continue; // we don't need the class name
  sb.append("" + prop + "");
}
sb.append("");

// Print rows
for(User u : users) {
  sb.append("");
  for(String prop : props)  {
    if(prop.equals("class")) continue; // we don't need the class name
    sb.append("" + BeanUtils.getProperty(u, prop) + "");
  }
  sb.append("");
}

And of course you have to take this further. Eg: on Spring MVC you can do similar thing: dump all the column name and values into your model object, and you can have a generic view that prints all sorts of domain object collection into a table.

How cool is that :).

Creating New Java EE 7 Maven Eclipse Project

Still on the Java EE 7 hype, here’s a quick cheat sheet on how to create a minimal Java EE 7 ready maven project:

  1. Ensure you have Eclipse Indigo installed with m2e (maven connector). If not you can drag and drop this logo into running Eclipse instance

    (thanks m2e team)
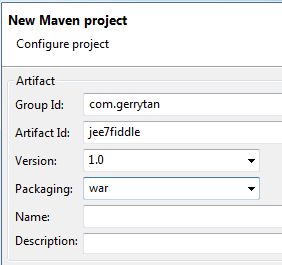
  2. Create new maven project, tick Create a simple project (skip archetype selection), on the next screen provide Group Id, Artifact Id, and set Packaging to war. Hit Finish
    new maven proj cut
  3. Open pom.xml, switch to source view. Add Java EE 7 dependency. Set the scope to provided so that it is included at compile time, but not on the war bundle (because it should be provided by container)
    
      4.0.0
      com.gerrytan
      jee7fiddle
      1.0
      war


          javax
          javaee-api
          7.0
          provided


  4. Tell Maven to compile using JDK 7, otherwise the deafault is JDK 5


            maven-compiler-plugin
            3.1
            
              1.7
              1.7


  5. And finally prevent maven-war-plugin from complaining because of missing web.xml. New Java EE 7 style provides good annotation support, web.xml can be omitted for a simple project
          
          
            maven-war-plugin
            2.3
            
              false


  6. Right click on the project -> Maven -> Update Project… -> OK. This will cause m2e to synchronize with all changes we made
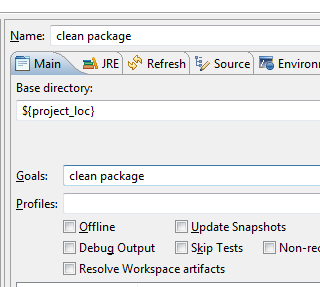
  7. Test your new project by running clean package
    maven run cut
    You should end up with a war bundle with your project name under target directory

Working With Eclipse and Glassfish

With the new launch of Java EE 7, I felt the quickest way to get a taste of it is to use Glassfish (Java EE reference implementation). Here’s how to get started with Glassfish and Eclipse:

Eclipse GlassFish Setup

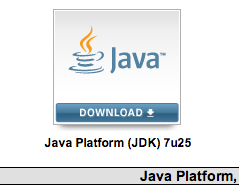
  1. Download and install JDK 7 if you haven’t done so.
    jdk download


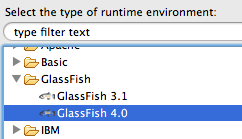
  2. Ensure you have Eclipse installed. First we’ll add Glassfish runtime environment. On Eclipse, go to Preferences -> Server -> Runtime Environments -> Add and select Glassfish -> Glassfish 4.0 (Select Download additional server adapter if you can’t find it).

    eclipse glassfish 01

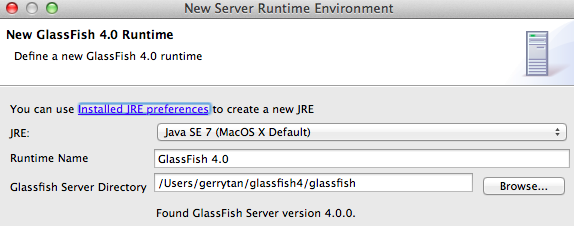
    Hit Next, select Java 7 runtime and glassfish directory (On windows this is normally C:glassfish4glassfish)

    glassfish eclipse setup 1

  3. Next, create a new Glassfish server. Ctrl+N (or Cmd+N on Mac) and select Server -> Server. Select server type GlassFish -> GlassFish 4.0. Accept all defaults and hit Finish. You should now have a Glassfish server on your Servers tab on eclipse:

    eclipse glassfish 2

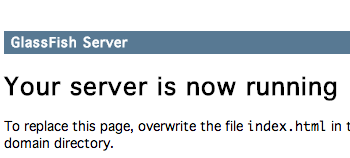
  4. To test your server, select the Glassfish 4.0 Server from Eclipse server tab and right click -> Start. Glassfish server will output few messages to the console, and you can verify by opening http://localhost:8080 on your browser, you will see something like this:

    glassfish server running

    Right click the server -> Stop to stop the server.

Create New Glassfish Application Project

Now we have eclipse wired to Glassfish, we can begin coding the application.

  1. Create a new dynamic web project: Ctrl+N (or Cmd+N on Mac) -> Select Web -> Dynamic web project. Configure it like following:
    Screen Shot 2013-06-29 at 2.46.42 PM

    Accept all default (or configure if you need to) and hit Finish

Installing Spring Security On Spring MVC Project

These are steps required to install Spring Security for a form authentication implementation on a Spring MVC project.

  1. Maven Dependencies.

    
            org.springframework.security
            spring-security-core
            3.1.4.RELEASE
    
    
            org.springframework.security
            spring-security-config
            3.1.4.RELEASE
    
    
            org.springframework.security
            spring-security-web
            3.1.4.RELEASE
    
    
  2. Add Spring Security filter to web.xml
    
    
            springSecurityFilterChain
            org.springframework.web.filter.DelegatingFilterProxy


            springSecurityFilterChain
            /*
    
    
  3. Add a security-context.xml spring beans config file. You can place all your security config on root application context xml but separating it would produce clearer code without namespace prefix clutter


  4. Add basic HTTP form authentication and provider as seen on Spring reference manual


Connecting to MongoDB On Visual C++ / Visual Studio 2010

Environment / Dependencies:

  • Windows 7 64bit
  • Visual Studio 2010 (Win32-Release target project)
  • MongoDB 2.2.3
  • Git

Visual Studio 2010 sample client project doesn’t appear to compile on the latest version of mongodb source code (2.4.3 at the time of this writing). It seems the last working sample is version 2.2.3. Follow these steps to compile and use it as your starting point

  1. Clone the source code from git:
    git clone git://github.com/mongodb/mongo.git C:mongodbsrc
  2. Open command prompt to C:mongodbsrc, switch to version 2.2.3 by running:
    git checkout r2.2.3
  3. Double click C:mongodbsrcsrcmongoclientexamplessimple_client_demo.vcxproj. If Visual Studio prompt to upgrade, don’t do it
  4. Compile the project on visual studio and test it. Use this as your starting point
  5. If you’re trying to copy the settings into your own project, pay particular attention to following items:
    • Boost cpp files and mongo_client_lib.cpp inclusion
    • VC++ Directories
    • C/C++ –> General –> Additional Include Directories
    • C/C++ –> Preprocessor –> Preprocessor Definitions
    • Linker –> Input –> Additional Dependencies
    • Additional preprocessor definitions only for these boost files: thread.cpp, tss_dll.cpp, tss_pe.cpp
    • Different Output Files for utf8_codecvt_facet.cpp file

Quick Cheat Sheet

// Connecting to mongodb on c++
mongo::DBClientConnection conn;
conn.connect("localhost");

// mongo shell
db.mycoll.insert({name: "Gerry", age: "25"})

// c++
conn.insert("mydb.mycoll", BSON("name" << "Gerry" << "age" << 25));

// mongo shell
db.mycoll.update({name: "Gerry"}, {name: "Gerry", age: "30"}, {upsert: "true"})

// c++
conn.update("mydb.mycoll", BSON("name" << "Gerry"), BSON("name" << "Gerry" << "age" << 30), 1);

Documentations:

  • http://docs.mongodb.org/ecosystem/tutorial/download-and-compile-cpp-driver

Changing Eclipse Colour Theme

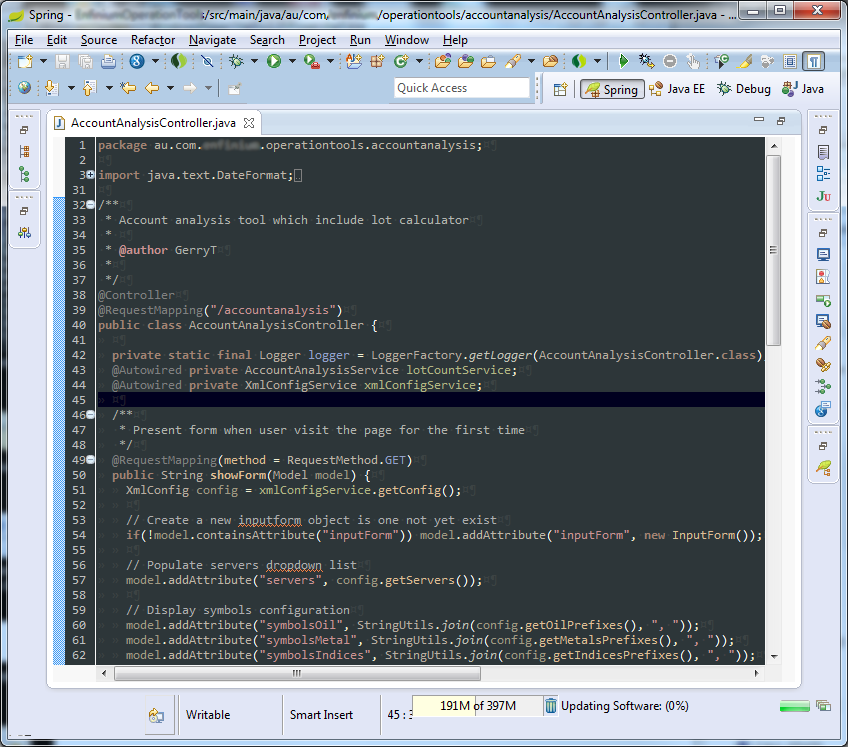
The default eclipse colour scheme is too bright and quite painful to the eye. Trying to change it isn’t the easiest thing to do either as I have spent 30min with no luck. But thanks to the guys behind Eclipse Color Theme plugin, you can change the color theme in an instant.

eclipsecolor

Installing the plugin is way too easy too, just drag and drop button below to running eclipse window (not on the text editor bit — but on the menu / other area)


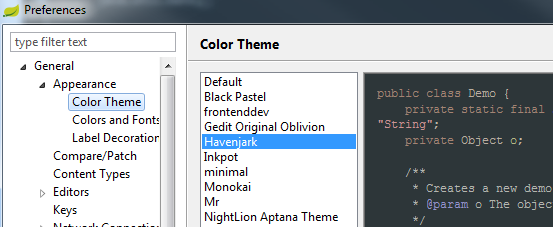
Once installed and eclipse restarted, you will find following menu on the preference window to change colours

eclipse color theme 01

Unfortunately this only changes the editor window. Many other community attempts to change other components aren’t yet effective & looks good for Eclipse 4 running on Windows 7. Stay tuned will keep you posted.

Binding Date Form Input On Spring MVC

So you have a form that takes a date input like this:

dateform

It’s always handy to represent the form as a Pojo that gets bound automatically to/from your controller class:

public class AddCustomerForm {
  private String name;
  private String email;
  private Date dob;

  /* getters & setters */
}

Notice the usage of java.util.Date type for the dob field. If you do nothing, the binding wouldn’t work and resulting in error instead because Spring MVC doesn’t know how to convert the text form input into a Date object.

The trick here is to add annotation on the date property:

  (pattern = "dd/MM/yyyy")
  private Date dob;

(Since Spring 3.2 you don’t need Joda library to use this annotation)

Now on your controller the form input will automatically binds into your pojo

public String addCustomer(("addCustomerForm") AddCustomerForm form) {
  // do something with form input ..
}

Auto Incrementing Field On Spring Data MongoDB

MongoDB came with all sophisticated ObjectId generation feature, but often you just jumped the ship from relational database, and you still want an easy to read / communicate numeric identifier field which automatically increments every time new record is inserted.

One neat suggestion from MongoDB tutorial is to use a counter collection with a ‘counter name’ as its id, and a ‘seq’ field to store the last used number:

db.counters.insert({
  _id: "users",
  seq: 0
})

Then use findAndModify function to increment and obtain the next value.

db.counters.findAndModify({
        query: { _id: name },
        update: { $inc: { seq: 1 } },
        new: true
})

When developing using Spring Data MongoDB, this neat trick can be written as a simple service. Here I used the collection name as the counter name so it’s easy to guess / remember.

import static org.springframework.data.mongodb.core.query.Query.*;
import static org.springframework.data.mongodb.core.query.Criteria.*;
import static org.springframework.data.mongodb.core.FindAndModifyOptions.*;


public class CounterService {
   private MongoOperations mongo;
  
  public int getNextSequence(String collectionName) {

    Counter counter = mongo.findAndModify(
      query(where("_id").is(collectionName)), 
      new Update().inc("seq", 1),
      options().returnNew(true),
      Counter.class);
      
    return counter.getSeq();
  }
}

Counter is just a simple class representing the collection. Please beware the usage of int data type, this will limit to 2^31 entries maximum.

(collection = "counters")
public class Counter {
  @Id private String id;
  private int seq;
  /* getters & setters .. */
}

Then when inserting a new entry (with help of ), just set the id field like this before you save it

User newUser = new User();
newUser.setId(counterService.getNextSequence("users"));
newUser.setUsername(username);
newUser.setPassword(password);

userRepository.save(newUser);

You’ll get an incrementing simple numeric id each time you insert new object

Windows 7 nslookup Resolves But Ping And Others Failed

As a wannabe network admin at the office, I’ve been dealing with a really tricky problem for the past few days. Long story short, I have few development servers and I want to setup CNAMEs pointing to it so it’s easy to remember.

The problem is every 15-20min the CNAME will stop resolving. If I try to ping it gives name not found. However nslookup still resolves fine.

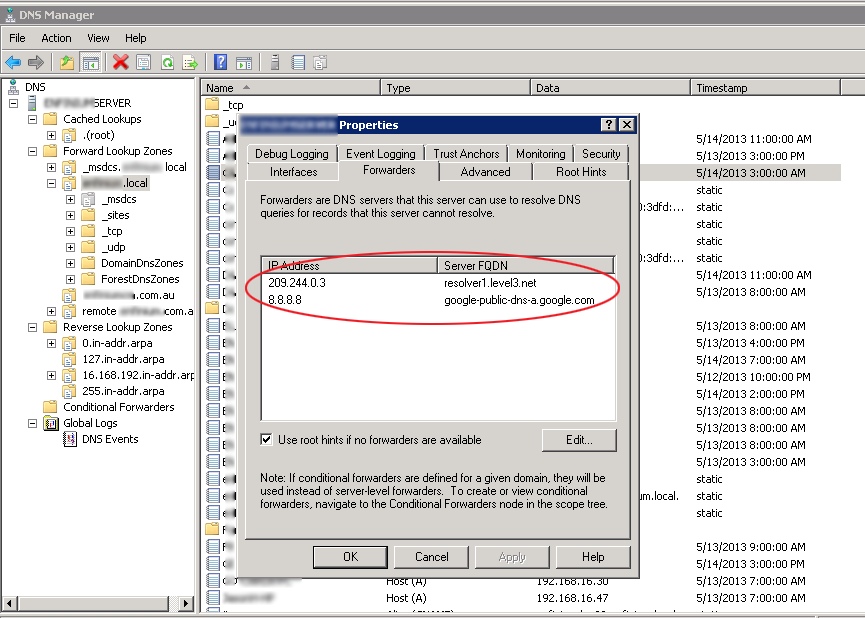
I’ve tried many different things with no luck until I finally found the problem: we mistakenly configured multiple public DNS on our DHCP settings alongside our primary internal DNS hosted on Windows Small Business Server 2011 (SBS). As shown below the configuration after we fixed it, only 1 entry is listed pointing to our internal DNS

ipconfig

It seems if multiple DNS servers are configured, windows will pick a primary one at random / round robin. If the primary happens to be the one other than our internal DNS, it won’t be able to resolve the CNAME entries.

This setting can be changed on DHCP configuration tool on SBS as shown below

dhcpconfig

And to make sure internet-wide name resolution still works. The public DNS have to be setup on the internal DNS forwarder on SBS DNS configuration

dnsforwarder

Add to the original confusion was I kept wondering why non CNAME alias still can be resolved all this time. This turns out due to the fact Windows uses not only DNS, but a set of other services to translate hostname into IP:

  1. Client check if the name queried is of its own
  2. Client checks local hosts file (eg: %Systemroot%System32Driversetc)
  3. DNS are queried
  4. NetBIOS

(Quoted from http://support.microsoft.com/kb/172218)

Notice that if DNS fails on step 3 regular PC names still can be resolved using NetBIOS, but in the case of CNAME it wouldn’t work.

Using GMail With Your Own Domain E-mail

If you own a domain name (for small business or so), email will look more professional than . However you might be annoyed having to check multiple mailboxes. Here’s how you can link everything into one GMail mailbox.

Setup Incoming Mail Forwarding On Your Domain Hosting Service

  1. Login into your domain hosting control panel. If you’re on GoDaddy, login to MyAccount and launch E-mail product
  2. Select Create Forward, enter  and forward it to  (you can even add multiple e-mails)
  3. Wait for a few minutes, and at this point you should get incoming mail forwarded to your gmail mailbox

Configure GMail For Sending As

  1. Go to GMail setting (gear icon on the top right), select Accounts and Import
  2. Under Send Mail As section, select Add Another Email You Own, follow the prompt and verification
  3. When sending email, don’t forget to change the From address to

Gerry's software development journey of trial, errors and re-trials