Ever wondered who is currently logged in to your app or how to kick them out? . You can do it using SessionRegistry.
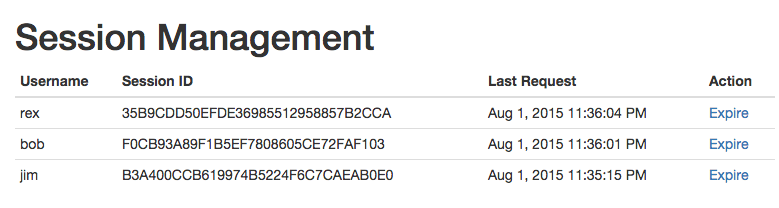
(Disclaimer: UI is self-coded, not provided by Spring)
First, setup spring security configuration
Java config:
.and()
  .sessionManagement()
    .maximumSessions(1) // How many session the same user can have? This can be any number you pick
    .expiredUrl("/login?expired")
    .sessionRegistry(sessionRegistry)
And register the sessionRegistry bean:
(name = "sessionRegistry")
public SessionRegistry sessionRegistry() {
  return new SessionRegistryImpl();
}
Or XML config, place this below :
Now you can list currently active sessions
Inject a SessionRegistry and let’s see who’s currently logged in:
private SessionRegistry sessionRegistry;

public List getActiveSessions() {
  List activeSessions = new ArrayList<>();
  for(Object principal : sessionRegistry.getAllPrincipals()) {
    activeSessions.addAll(sessionRegistry.getAllSessions(principal, false));
  }
  return activeSessions;
}
Principal is just a fancy word for user in security speak. Note how SessionInformation returns a principal of type Object. If you use Spring Security your principal will most likely be the type of org.springframework.security.core.userdetails.User
Here’s how you can get the username from a User object:
SessionInformation session = ... // get the session info somehow
Object principalObj = session.getPrincipal();
if (principalObj instanceof User) {
  User user = (User) principalObj;
  return user.getUsername();
}
If you need to kick someone out
The use case of this is not just for when you hated a particular user so much, but if user permission is updated, then you have to invalidate all active sessions for it to take effect.
public void logoutSession(String sessionId) {
  SessionInformation session = sessionRegistry.getSessionInformation(sessionId);
  if (session != null) {
    session.expireNow();
  }
}
This setup only works assuming you have on your main configuration class. By default Spring Security will provide a login form at /login but you can implement your own. I’ve also setup two users to test it
The Web MVC auto configuration feature of Spring Boot sets you up with a ViewResolver with blank suffix and prefix, hence you can place jsp in src/main/webapp/WEB-INF/test.jsp and have your controller return path to it
("/test")
public class TestController {
  (method = GET)
  public String test() {
    return "/WEB-INF/test.jsp";
  }
}
Spring Security comes handy when you need to secure your RESTful web service. Let’s give this a go! In this example I’ll create a REST service exposing a Cat entity. It simply have name and colour field
{
  "name" : "Tom",
  "colour" : "Black"
};
Creating the Service
Setup a new maven project with following pom.xml. We’ll leverage Spring Boot to simplify the work.
Setup a main configuration class. This substitutes the old-fashioned spring context xml. Spring Boot will do a lot of under-the-hood work to setup various bits and pieces using auto configuration
guration

public class Application {

  public static void main(String[] args) throws Exception {
    SpringApplication.run(Application.class, args);
  }

}
Now let’s create our Cat JPA entity
public class Cat {

  @Id

  private long id;

  private String name = "";

  private String colour = "";

  /* .. getters & setters omitted .. */
}
Since we included dependency to spring-boot-starter-data-jpa, Spring Boot will automatically set us up with JPA with Hibernate implementation. Also note that on pom.xml we declared a dependency to hsqldb which will automatically give us datasource to an embedded HSQL database.
Next, let’s create a Spring Data repository for Cat.
esource
public interface CatRepository extends PagingAndSortingRepository {

}
Again, spring-boot-starter-data-jpa will auto setup spring-data-jpa for me, and it will automatically provide an implementation of the repository interface at runtime.
Take a note at the esource annotation. This annotation tells Spring Data REST to expose the repository as REST service as well.
Testing the Service
Now you’re ready to run the app using the embedded tomcat container. Run following maven command
Next, configure Spring Security so /cats/** path are protected to users with ROLE_USER only. We also setup two in-memory users: bob with ROLE_USER and admin with ROLE_USER and ROLE_ADMIN
Don’t forget to recompile and restart the app. Now you can test querying the cats repository will be forbidden for non-authenticated (anonymous) users:
The -H option passes a HTTP header as part of the request. Also note that the username and password joined by colon (:) is encoded into Base64 resulting in the string Ym9iOmJvYjEyMw==. This is the string “bob:bob123″ in plain text. You can use an to try it yourself.
Also note that similar to web browser the server gave us a JSESSIONID Cookie:
Different Security Permission for Read / Update Operations
What if you want to give ROLE_USER read-only access and full read/write to ROLE_ADMIN?
This can be achieved by using Spring Data Repository event handler class. You can invoke custom code prior / after certain operations executed on the repository. Let’s see how this works.
First enable method security on our SecurityConfig class. Add the hodSecurity(securedEnabled = true) annotation to SecurityConfig class:
ty
hodSecurity(securedEnabled = true)
public class SecurityConfig extends WebSecurityConfigurerAdapter {
 ...
}
Create a new CatEventHandler class annotated with Handler(Cat.class)
Handler(Cat.class)
("ROLE_ADMIN")
public class CatEventHandler {

  private static final Logger LOG = LoggerFactory.getLogger(CatEventHandler.class);

  e
  public void handleBeforeSave(Cat c) {
    LOG.debug("Before save " + c);
  }

  ate
  public void handleBeforeCreate(Cat c) {
    LOG.debug("Before create " + c);
  }

  kSave
  public void handleBeforeLinkSave(Cat c) {
    LOG.debug("Before link save " + c);
  }

  ete
  public void handleBeforeDelete(Cat c) {
    LOG.debug("Before delete " + c);
  }

  kDelete
  public void handleBeforeLinkDelete(Cat c) {
    LOG.debug("Before link delete " + c);
  }
}
Few important things happening here:
All the .. methods will be invoked before the corresponding response is given to users
The (“ROLE_ADMIN”) annotation will ensure only users with ROLE_ADMIN can invoke all those methods in the class (although the method has nothing in it except a logging statement)
Let’s give this a try. Authenticate as bob:bob123 again and try creating a new Cat. Error will be presented:
I find it annoying to keep having to encode our username and password into Base64. I wanted a more simplified login such as posting u=bob&p=bob123 to http://localhost:8080/login.
Let’s try doing this.
Borrowing idea from , let’s create a LoginController
("/login")
public class LoginController {


  private SecurityConfig securityConfig;

  private AuthenticationDetailsSource authenticationDetailsSource = new WebAuthenticationDetailsSource();

  private static final Logger LOG = LoggerFactory.getLogger(LoginController.class);

  (method = RequestMethod.POST)
  public String login(("u") String username,
    ("p") String password,
    HttpServletRequest req) throws Exception {

    // Force session creation so it's available to Spring Security post processor filter
    req.getSession(true);

    // Authenticate using AuthenticationManager configured on SecurityContext
    AuthenticationManager authMgr = securityConfig.authenticationManagerBean();
    UsernamePasswordAuthenticationToken authReq = new UsernamePasswordAuthenticationToken(username, password);
    authReq.setDetails(authenticationDetailsSource.buildDetails(req));
    Authentication authResp = authMgr.authenticate(authReq);

    // If successful add the authentication response to context so the post processor filter
    // can save it to session
    SecurityContextHolder.getContext().setAuthentication(authResp);

    return "Authentication successful";
  }

  ...
}
Also create some exception handlers so login failure will produce 401 – Unauthorized HTTP status code.
Yay! Well done on making it this far. Hope you get a pretty decent looking REST API with minimal effort thanks to Spring. Don’t forget to always serve your API in HTTPS if deploying in production environment and secure it further with firewall if applicable.
As always you can browse the source code of this article on github:
In my app I have lots of scheduled service classes implemented like this:
public FiddleService {
   private TaskScheduler scheduler;


  private void setupScheduler() {
    Runnable task = new Runnable() {
       public void run() {
        letsFiddle();
      }
    };
    scheduler.scheduleAtFixedRate(task, 10 * 1000);
  }


  public void letsFiddle() {
    ...
  }
}
At first the structure looked relatively simple, the scheduler will call letsFiddle() every 10 seconds. AOP-transaction wise I thought this should be okay since I used AspectJ mode (instead of JDK proxy).
But I just discovered this is wrong! The annotation was not effective if it’s invoked inside an inner-class.
Yep I only figured this out when strange transaction related behaviour started occuring in my app.
Few trials and errors, and I figured out the best way to implement this is to always separate the task in its own class:
public class FiddleService {

  public void letsFiddle() {
    ...
  }
}
public class FiddleServiceScheduler {
   private TaskScheduler scheduler;
   private FiddleService fiddleService;


  private void setupScheduler() {
    Runnable task = new Runnable() {
       public void run() {
        fiddleService.letsFiddle();
      }
    };
    scheduler.scheduleAtFixedRate(task, 10 * 1000);
  }
}
This will ensure all construction-related work is done on FiddleService (possibly AOP-tx related stuff) before we invoke its transactional method
Here’s my situation, I have myapp.firstdomain.com and myapp.seconddomain.com and I want my app to be styled / branded differently according to which domain used to access the app.
To keep things simple, each theme would have its own properties file with corresponding values. For example:
Next we have to register a ResourceBundleThemeSource. This tells spring where the theme specific properties file are located (in this instance we place them on themes/ folder on classpath root).
In Spring Boot, since I used automatic configuration for the web application context, additional customization has to be done via WebMvcConfigurerAdapter
public class WebMvcConfig extends WebMvcConfigurerAdapter {


  public ThemeSource themeSource() {
    ResourceBundleThemeSource themeSource = new ResourceBundleThemeSource();
    themeSource.setBasenamePrefix("themes/");
    return themeSource;
  }

}
Next I need to create a ThemeResolver bean that can determine the theme based on domain names. In this instance since I used a reverse proxy, I used X-Forwarded-For HTTP header to determine the hostname, but you can simply use Host header otherwise.
This ThemeResolver keeps a map of which domain transaltes to what theme.
public class DomainNameThemeResolver extends AbstractThemeResolver {

  private Map domainNameThemeMap = new HashMap();


  public String resolveThemeName(HttpServletRequest request) {
    String xFwdFor = request.getHeader("x-forwarded-for");

    if(xFwdFor == null) {
      return getDefaultThemeName();
    }

    String themeName = domainNameThemeMap.get(xFwdFor.trim().toLowerCase());
    if(StringUtils.isBlank(themeName)) themeName = getDefaultThemeName();

    return themeName;

  }


  public void setThemeName(HttpServletRequest request, HttpServletResponse response, String themeName) {

  }

  public Map getDomainNameThemeMap() {
    return domainNameThemeMap;
  }

  public void setDomainNameThemeMap(Map domainNameThemeMap) {
    this.domainNameThemeMap = domainNameThemeMap;
  }

}
And finally, back to the WebMvcConfigurerAdapter, I also need to register this ThemeResolver bean
public ThemeResolver themeResolver() {
  DomainNameThemeResolver themeResolver = new DomainNameThemeResolver();
  themeResolver.setDefaultThemeName("firstdomain");
  themeResolver.getDomainNameThemeMap().put("myapp.firstdomain.com", "firstdomain");
  themeResolver.getDomainNameThemeMap().put("myapp.seconddomain.com", "seconddomain");
  return themeResolver;
}
The theme-specific key value pairs can then be obtained on the thymeleaf view using the special #themes.code(...) syntax. Here’s an example:
Note that if you’re debugging your theme resolver, Spring won’t actually invoke the resolveTheme() method unless you are actually rendering a view that needs one (eg: a jsp view that contain tag).
By default Spring Boot will source messages src/main/resources/messages.properteis. Specific translations for various languages can be given using the file messages_ch.properties, messages_es.properties etc. This location can be adjusted using spring.messages.basename property. See MessageSourceAutoConfiguration class for more.
Using message is a handy way to externalize something from your view. If you’re using JSP, you can inject this value like this:
The app version is ${version}
Or in thymeleaf, it can be obtained directly using hash dialect:
There’s one thing that has been bothering me with Spring Boot’s embedded Tomcat container on Windows: it forks a new process which doesn’t die when the the parent process is terminated.
Here’s an example of the problem:
Run the app using maven mvn clean spring-boot:run command
Container starts up, do some testing, changed controller code and it’s now time to recompile again..
Clicked Eclipse’s stop and run button, and port has been used error came up. Now I have to go task manager, find the java process (among 3-4 other java processes) and kill it manually
This additional step really frustates me, identifying which java process you should kill isn’t always straight forward, you have to see the full command and see what it does.
Fortunately I found a workaround for this: scrap spring-boot-maven-plugin altogether and use the old-school tomcat7-maven-plugin. Here’s the step required to achieve this:
Remove spring-boot-maven-plugin configuration on pom.xml
Setup tomcat7-maven-plugin
org.apache.tomcat.maventomcat7-maven-plugin2.0
Instead of SpringApplication.run(Application.class, args), bootstrap Spring Boot using SpringBootServletInitializer instead, eg:
guration

public class Application extends SpringBootServletInitializer {


  protected SpringApplicationBuilder configure(SpringApplicationBuilder application) {
    return application.sources(Application.class);
  }

}
This is required such that SpringBoot can boot the container when tomcat starts up
Ok all good now, I started my app with mvn clean test tomcat7:run command, but wait.. there’s a weird exception being thrown:
Aug 22, 2014 4:01:46 PM org.apache.catalina.startup.ContextConfig parseWebXml
SEVERE: Parse error in application web.xml file at file:/C:/***/***/***/target/tomcat/conf/web.xml
org.xml.sax.SAXParseException; systemId: file:/C:/***/***/***/target/tomcat/conf/web.xml; lineNumber: 108; columnNumber: 15; Error at (108, 15) : org.apache.catalina.deploy.WebXml addServlet
  at org.apache.tomcat.util.digester.Digester.createSAXException(Digester.java:2687)
  at org.apache.tomcat.util.digester.Digester.createSAXException(Digester.java:2719)
  at org.apache.tomcat.util.digester.Digester.endElement(Digester.java:1054)
  at com.sun.org.apache.xerces.internal.parsers.AbstractSAXParser.endElement(AbstractSAXParser.java:606)
...
Caused by: java.lang.NoSuchMethodException: org.apache.catalina.deploy.WebXml addServlet
  at org.apache.tomcat.util.IntrospectionUtils.callMethod1(IntrospectionUtils.java:855)
  at org.apache.tomcat.util.digester.SetNextRule.end(SetNextRule.java:201)
  at org.apache.tomcat.util.digester.Digester.endElement(Digester.java:1051)
  ... 27 more
Took me quite a while to figure out, but it seems this problem is caused by a classpath conflict. My app uses spring-boot-started-web dependency which pulls spring-boot-starter-tomcat, which pulls various tomcat jars as dependency.
After a few trial and errors, I found the solution by marking spring-boot-started-tomcat as provided in the dependencies in pom.xml
What is this fancy words “Declarative Transaction Management” (DTM) ? Well.. basically it’s the “magic” behind the annotation in Spring.
By default Spring will use JDK Proxy for DTM, but it’s not without a big (yes BIG) gotchas.. Let’s take a look at below cliche example of transferring money from a bank account to another with slight variation — here several transfer requests are processed together by processBatch method:
public class AccountService {

public void processBatch(List xferReqs) {
    for(TransferReq xferReq : xferReqs) {
      transfer(xferReq.getAmount(),
               xferReq.getFromAccountNo(),
               xferReq.getToAccountNo());
    }
  }


  public void transfer(double amount, long fromAccountNo, long toAccountNo) {
    checkBalanceIsGreaterThan(fromAccountNo, amount);
    withdraw(fromAccountNo, amount);
    deposit(toAccountNo, amount);
  }


  public void checkBalanceIsGreaterThan(long accountNo, double amount) {
    ...
  }


  public void withdraw(long fromAccountNo, double amount) {
    ...
  }


  public void deposit(long toAccountNo, double amount) {
    ...
  }

}
When another class invokes processBatch, you’d expect the database transaction to happen like this:
begin
req1 transfer
req1 checkBalanceIsGreaterThan
req1 withdraw
req1 deposit
commit

begin
req2 transfer
req2 checkBalanceIsGreaterThan
req2 withdraw
req2 deposit
commit
...
But it’s NOT! This is a big hidden pitfall that I’ve fallen into (had to learn the hard way right?). Here’s why..
In JDK Proxy Spring did the “magic trick” by automatically creating a subclass with extra DTM functionality (hence the name “proxy”) in place of the original transactional class. The subclass method actually do the transaction management before calling the underlying method.
This has the implication that transaction management will only occur if the method you invoke from a different class is a method.
Since in above example the processBatch method invoked is not a method, transaction management will not be performed!
Here’s a rough example of what the auto-created JDK proxy class might look like:
public class AccountServiceProxy extends AccountService {
public void processBatch(List xferReqs) {
super(xferReqs); // <-- Superclass method is invoked here,
// the below transfer method will NOT execute
}
public void transfer(double amount, long fromAccountNo, long toAccountNo) {
// Code to "check if transaction exist, if not create one" goes here..
So yes your database transaction is a mess. Every single statement would be executed in its own transaction (oh no!)..
So How To Fix It?
Well you have several option. First is to keep using JDK Proxy but structure your class such that the first method invokes is a method. In the above example, the processBatch method can be moved into a different class AccountBatchProcessorService, hence when it invokes the proxy class’ transfer method DTM occurs.
Or you leave the code as it is and use the almighty AspectJ..
AspectJ Declarative Transaction Management
With AspectJ, DTM is not done by subclass “proxy”, but there’s a unicorn hiding beneath the cloud that adds DTM code to your method just before it’s compiled (sometimes it’s called “compile-time weaving”).
Here’s how you can enable AspectJ DTM for your project:
On the old-fashioned Spring xml configuration (don’t ask me the new-style annotation config yet, haven’t RTFM), to enable annotation you would have something like this:
  ...

  ...
You need to set it into aspectj mode
Then in your pom.xml, add dependency to spring-aspects
At this point your STS/eclipse project might throw error saying Maven configuration is not up to date. If so do right click on the project -> Maven -> Update project. If the setup is good in STS/eclipse you should see a half circle arrow on methods.
Voila! Your bank transfer should work as expected now
Debugging Database Transaction
Lastly if you’re using Hibernate and log4j, you can get it to spit the SQL statements and ‘begin’ and ‘commit’ log by setting following loggers into DEBUG
It’s unimaginable how many apps still force its user to manually update — they’re very annoying! Fortunately if your app is a Java Web App (eg: running in Tomcat) you can set it up to auto-update silently. This is very helpful if you deploy your web-app onsite on clients’ infrastructure.
This article assumes you have a basic understanding of Spring MVC. The article is written against Spring Framework version 4.0.3.RELEASE.
The UpdaterService
The first thing to setup is an UpdaterService that checks periodically if a new version is available. You will need a TaskScheduler to schedule the periodic job. Feel free to either use Java annotation or XML style:
// Java annotation

g
public class AppConfig {
  ...
}
Once setup, you can decorate a method with annotation and it will be invoked by the scheduler
thread every specified period.
In below example my UpdaterService class has a checkAndInstallUpdate() method that get invoked by the scheduler thread every 8 hours.
public class UpdaterService {
  (fixedDelay=8*3600)
  public void checkAndInstallUpdate() {
  }
}
I will not go into much detail on how to check and download the update. There are tons of way of doing it and one popular method is to use Apache HttpClient library.
Typically you would upload your war/jar artifact in your website and have a REST service for apps to check if new version is available. If so then download and install it.
The other thing you need to make sure is the war/jar file isn’t file-system-locked when the app is running so it can be overwritten by the new version. Self-executing Tomcat does not lock the jar.
Restarting Tomcat
Here comes the tricky bit. First use ProcessBuilder to spawn a new OS process
In the example above it is assumed you have a windows script called run.bat and the value of environment variable MY_APP_PATH is set to the folder that contain the run script.
And directly after that, terminate the JVM using System.exit(0)
System.exit(0);
The termination of the old process will not affect the new ones. And yes, you need to start the new process before you terminate the old one, otherwise it wouldn’t have chance to do so.