Tag Archives: java

Spring MVC File Upload Form

Objective : Setup a form with file upload field

Environment

  • Spring MVC 3.2.3.RELEASE
  • Commons Fileupload 1.3

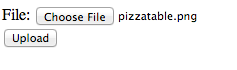
First let’s code the JSP view of the form. Note below enctype=”multipart/form-data” setting is important, it tells the browser to post the form data as multipart.


File:

Above JSP will result in a simple file upload form like this:

fileuploadform

Then add commons-fileupload 1.3 maven dependency to your pom.xml:


  commons-fileupload
  commons-fileupload
  1.3

And configure CommonsMultipartResolver on your spring context. The bean id name is important. Also below I configured it to have maximum file size of 1 mb (1000000 bytes)


Now we’re ready to code the controller handler method. The uploaded file is automatically bound into a object from which you can obtain input stream.

(value = "/", method = RequestMethod.POST)
public String upload(("myfile") MultipartFile myFile) {
  logger.info("Received file of size " + myFile.getSize() + " bytes");
  InputStream inputStream = myFile.getInputStream();
  // .. do something with inputStream
  inputStream.close();
  return "home";
}

Looking Up Context Path On a JSP Page

Supposed you have a cool web application running on http://mycompany.com/mycoolapp and you have few static resources such as CSS, images and javascripts under resources folder:

mycoolapp.war
  +-resources
    +-images
    | +-logo.jpg
    +-css
    | +-common.css
    | +-login.css
    +-js
      +-jquery.min.js

One common issue that appear is you can’t simply reference these static resources using relative path from your JSP page like this:


Although in many cases it works fine, but if you have multi level URLs like http://mycompany.com/mycoolap/login, http://mycompany.com/mycoolap/users/1234 the relative path would be different for each, which means your code isn’t reusable.

Putting a slash “/” in front of the path to make it semi-absolute isn’t always a good idea either because if the context-path name changes all your references are broken.


The method that has worked best for me so far is by using JSP’s tag. First ensure you have declared the jstl core tag at the top of your JSP page, and create a “root” variable like this:

<%@ taglib prefix="c" uri="http://java.sun.com/jsp/jstl/core" %>


Now the JSP variable “root” always refers to your context path, you can use it to reference your static resource like this:


Hibernate One To Many Relationship

Continuing from my post Spring MVC + Hibernate + MySQL Quick Start From Scratch, here is how to setup one to many relationship on Hibernate.

Let’s assume you want to add a new table called topping, each pizza can have several toppings (one to many relationship).

Pizza table
pizzatable

Topping table
topping table

First code the Topping entity class:

(name = "topping")
public class Topping {
  @Id
  
  private long id;
  
  private String name;
  
  
  (name = "pizza_id", referencedColumnName = "id")
  private Pizza pizza;

  // getters & setters..
}

Notice the usage of and annotation. This allows the owning Pizza to be queried from the Topping. This also says “in order to find pizza that owns this topping, have a look at pizza_id column on topping table, match it with id column on pizza table”

And let’s have a look at our modified Pizza entity class:

(name = "pizza")
public class Pizza {
  @Id  private long id;
  private String name;
  private double price;
  
  (mappedBy = "pizza", fetch = FetchType.LAZY)
  private List toppings;

  // getters & setters
}

This setups a bi-directional relationship where you can obtain list of toppings from a Pizza object, and the owning Pizza from a Topping object. The mappedBy attribute refers to the java property name of Pizza reference on the Topping class.

The FetchType.LAZY setting tells Hibernate not to bother populating the toppings unless we ask it to (this is handy to conserve memory if you have a long chains of relationships with thousands of objects on it).

Next if I want to list my pizzas with its topping, I can write following method on my DAO class:

public List findAllWithToppings() {
  Session session = sessionFactory.getCurrentSession();
  List pizzas = session.createQuery("select distinct p from Pizza as p left join fetch p.toppings").list();
  return pizzas;
}

The above hibernate query will roughly translate into following SQL:

select * from pizza p left outer join topping t on p.id = t.pizza_id;

Download the source code

git clone https:///gerrytan/pizzashop.git -b one_to_many

Spring MVC + Hibernate + MySQL Quick Start From Scratch

This is a tutorial to build a very simple pizzashop Spring MVC, Hibernate and MySQL application. The main page shows all pizza rows stored on a database table:

03

Technology in Java world moves very fast. Using straight Hibernate might no longer be preferable since Java EE 5 introduces JPA (Java Persistence API) but it’s still good to learn anyway. Spring MVC and Hibernate is one of the most popular Java libraries used out there.

Tools / Environment Required
If you’re just starting fresh and don’t have most of the tools below just install JDK, STS (Springsource Tools Suite) and MySQL server, everything else is bundled within them.

Project Setup and Boilerplate

  1. First, create new Maven project on STS. Skip archetype selection. Pick maven group id, artifact id and select packaging to war.01 02

  2. By default Maven will use JDK 1.5, re-configure it to use 1.6. Add following maven-compiler-plugin section to pom.xml under element. Ensure the change takes effect by updating maven project settings (right click on project -> Maven -> Update project…).


          org.apache.maven.plugins
          maven-compiler-plugin
          3.1
          
            1.6
            1.6


  3. Add Spring, Hibernate, Java EE and MySQL maven dependencies to pom.xml. Place following under element.
    
      3.2.3.RELEASE
      4.2.2.Final


        org.springframework
        spring-context
        ${spring.version}
      
      
        org.springframework
        spring-webmvc
        ${spring.version}
      
      
        org.springframework
        spring-orm
        ${spring.version}


        org.hibernate
        hibernate-core
        ${hibernate.version}


        javax.servlet
        servlet-api
        2.5
        provided
      
      
        jstl
        jstl
        1.2


        commons-dbcp
        commons-dbcp
        1.4
      
      
        mysql
        mysql-connector-java
        5.1.25


  4. Create a web.xml descriptor file with Spring MVC servlet setup on it, place it on src/main/webapp/WEB-INF


        appServlet
        org.springframework.web.servlet.DispatcherServlet
        
          contextConfigLocation
          /WEB-INF/servlet-context.xml
        
        1


        appServlet
        /


  5. Create src/main/webapp/WEB-INF/servlet-context.xml Spring bean config file for dispatcher servlet. We configure few important stuffs in here:


            com.gerrytan.pizzashop


            hibernate.dialect=org.hibernate.dialect.MySQLDialect


The Business Functionality

  1. Now all the boilerplate code done, we can start coding the business functionality. For this simple app we will have a pizza database table with just id, name and price column. Create the Pizza entity class representing the table
    package com.gerrytan.pizzashop;
    // imports ..
    
    
    (name = "pizza")
    public class Pizza {
      @Id  private long id;
      private String name;
      private double price;
      /* getters & setters */
    }
    

  2. Create a DAO class to obtain Pizza entity persisted on database. Note that we won’t create service layer classes for the sake of simplicity (on real-life complex business application adding service layer is a good practice).
    package com.gerrytan.pizzashop;
    // imports..
    
    
    s({"unchecked", "rawtypes"})
    public class PizzaDAO {
       private SessionFactory sessionFactory;
      
      /**
       *  annotation below will trigger Spring Hibernate transaction manager to automatically create
       * a hibernate session. See src/main/webapp/WEB-INF/servlet-context.xml
       */
      
      public List findAll() {
        Session session = sessionFactory.getCurrentSession();
        List pizzas = session.createQuery("from Pizza").list();
        return pizzas;
      }
    }
    

  3. Create a Spring MVC controller to handle request from the main page. Note that PizzaDAO reference is injected, and after collection of Pizza entity objects are obtained it’s passed to the view using Model object.
    package com.gerrytan.pizzashop;
    // imports..
    
    
    ("/")
    public class PizzaController {
      
       private PizzaDAO pizzaDAO;
      
      /**
       * This handler method is invoked when
       * http://localhost:8080/pizzashop is requested.
       * The method returns view name "index"
       * which will be resolved into /WEB-INF/index.jsp.
       *  See src/main/webapp/WEB-INF/servlet-context.xml
       */
      (method = RequestMethod.GET)
      public String list(Model model) {
        List pizzas = pizzaDAO.findAll();
        model.addAttribute("pizzas", pizzas);
        return "index";
      }
    }
    

  4. Add a JSP view to list all the pizza entities passed by the controller
    src/main/webapp/WEB-INF/index.jsp

    <%@ page language="java" contentType="text/html; charset=ISO-8859-1" pageEncoding="ISO-8859-1"%>
    <%@ taglib uri="http://java.sun.com/jsp/jstl/core" prefix="c" %>


    Pizzashop


    List of All Pizzas

    • ${p.id} - ${p.name} - ${p.price}

  5. And finally prepare MySQL pizzashop database schema:
    CREATE SCHEMA `pizzashop`;

    And pizza table:

    CREATE  TABLE `pizzashop`.`pizza` (
      `id` BIGINT NOT NULL AUTO_INCREMENT ,
      `name` VARCHAR(45) NULL ,
      `price` DOUBLE NULL ,
      PRIMARY KEY (`id`) );
    

    And insert some data into it

    INSERT INTO `pizzashop`.`pizza` (`id`, `name`, `price`) VALUES ('I', 'Italian', '7.5');
    INSERT INTO `pizzashop`.`pizza` (`id`, `name`, `price`) VALUES ('2', 'Thin Crust', '6');
    INSERT INTO `pizzashop`.`pizza` (`id`, `name`, `price`) VALUES ('3', 'Pepperoni', '6.2');
    

    It is assumed you have MySQL server running on your local machine (localhost) on the default port 3306. The name of the schema is pizzashop and table pizza. Have a look at Spring beans configuration section above to reconfigure this.

Running The Code

  1. The easiest way to run your code is using in-memory Maven Tomcat plugin. It will launch on-the-fly Tomcat server with your code deployed. Make sure your project is selected on the project exploded and setup a maven run configuration on STS. Go to Run -> Run Configurations.. and create a new maven build entry like this:
    maven goal
  2. Click Run and navigate your browser to http://localhost:8080/pizzashop

Download The Source Code

Source code for this demonstration can be obtained using git:

git clone https://bitbucket.org/gerrytan/pizzashop.git -b basic

Congratz!

Well done on making it this far. Hopefully that was a quick and nice introduction to Spring MVC + Hibernate + MySQL and you can see how the tedious database to java class mapping is now simplified. You might have lots of questions in your mind by now — feel free to ask in the comment section below. Following are few official references and community article links you can browse around:

See Also

Java EE & Spring Cheatsheet

JSTL 1.2 Core JSP Taglib (aka c tag)

<%@ taglib uri="http://java.sun.com/jsp/jstl/core" prefix="c" %>

JSTL implementation jar has to exist on the classpath, eg add following dependency (in provided scope if container doesn’t provides it)


  jstl
  jstl
  1.2

See this blog post for more info.

Spring Taglib

  • Spring:
    <%@ taglib prefix="spring" uri="http://www.springframework.org/tags" %>
  • Form:
    <%@ taglib prefix="form" uri="http://www.springframework.org/tags/form" %>

JSTL fmt Taglib

<%@ taglib prefix="fmt" uri="http://java.sun.com/jsp/jstl/fmt" %>

web.xml deployment descriptor

  • v2.3


  • v3.0


Commons DBCP / MySQL Spring Bean Config


Hibernate / MySQL Session Factory & Transaction Manager Spring Bean Config


      com.gerrytan.hibernatefiddle


      hibernate.dialect=org.hibernate.dialect.MySQLDialect


Log4j Properties File

# Root logger option
log4j.rootLogger=INFO, stdout

# Direct log messages to stdout
log4j.appender.stdout=org.apache.log4j.ConsoleAppender
log4j.appender.stdout.Target=System.out
log4j.appender.stdout.layout=org.apache.log4j.PatternLayout
log4j.appender.stdout.layout.ConversionPattern=%d{yyyy-MM-dd HH:mm:ss} %-5p %c:%L - %m%n

This will print log in following format:

2013-06-26 10:15:35 DEBUG com.gerrytan.hibernatefiddle.StudentDAO:21 - StudentDAO created

To create file logger, limited to 5 file with max size 1000KB:

# Root logger option
log4j.rootLogger=WARN, file
 
# Rolling file appender
log4j.appender.file=org.apache.log4j.RollingFileAppender
log4j.appender.file.File=MyLog.log
log4j.appender.file.MaxFileSize=1000KB
log4j.appender.file.MaxBackupIndex=5
log4j.appender.file.layout=org.apache.log4j.PatternLayout
log4j.appender.file.layout.ConversionPattern=%d{yyyy-MM-dd HH:mm:ss} %-5p %c:%L - %m%n

If you’re using tomcat the log file typically goes to bin folder. To place it on logs you can use:

log4j.appender.file=${catalina.base}/logs/MyLog.log

Hibernate Logging

log4j.logger.org.hibernate.SQL=DEBUG
log4j.logger.org.hibernate.engine.transaction=DEBUG

On Hibernate 3 or earlier transaction logger is:

log4j.logger.org.hibernate.transaction=DEBUG

Hibernate 4.2.2 Transactions Logging

I just a hard time trying to enable transactions logging for hibernate. Checked many times and it said the logger name is

org.hibernate.transaction=DEBUG

But not a single logging output is given.

I then dig a bit deeper into the source code. Realized my hibernate version is 4.2.2 (latest doc as of writing this post is 4.2.1) and they seem to have refactored the package name into

org.hibernate.engine.transaction=DEBUG

And yes finally I can see my transactions being logged.

Deploying Standalone Java Project

There are two common approaches to deploy a Java program in a standalone environment:

Single (Uber Jar) Approach

“Uber Jar” is a single jar with all dependent classes and resources are dumped inside. This can be done easily using Maven assembly plugin:


  org.apache.maven.plugins
  maven-assembly-plugin
  2.3
  
    
      jar-with-dependencies


mvn clean package assembly:single

However this method could be faulty. Multiple dependency jars could have configuration file with the same path and they will overlap each other. For example both spring-context.jar and spring-beans.jar has META-INF/spring.handlers file:

spring-context-3.2.3.RELEASE.jar/META-INF/spring.handlers
spring-beans-3.2.3.RELEASE.jar/META-INF/spring.handlers

Exploded Deployment Approach

This slightly take more effort, but saver approach. Instead of dumping everything in a Uber Jar, deploy in an exploded fashion. You can get all runtime dependencies (that is “runtime”, “compile” and “provided” maven scope) placed inside target/dependency folder by configuring maven-dependency-plugin:


  maven-dependency-plugin
  2.8


        copy-dependencies
      
      
        runtime


Then deploy your jar in production server in directory structure similar like following

C:myscript
  +-- dependency
        +-- dep1.jar
        +-- dep2.jar
        +-- dep3.jar
  +-- myjar.jar
  +-- run.bat

The run.bat script is a simple java program to run your code (assuming MainClass name of com.mycompany.MainClass)

java -jar "./*;dependency/*" com.mycompany.MainClass

Using BeanUtils Reflection to Print HTML Table Without Hardcoding the Column

Apache Commons BeanUtils is a little (very) useful library you can use to perform metadata reflection work on the runtime. To use it with Maven, add following dependency (check http://search.maven.org for latest version)


  commons-beanutils
  commons-beanutils
  1.8.3

Supposed you have a simple domain class that represent a user with 3 properties (name, age, weight) like this

public class User {
        private String name;
        private int age;
        private int weight;
        
        /* Getters & Setters */
}

You can get all the name of the properties on the runtime simply by using describe method of BeanUtils

User u = new User();
Map props = BeanUtils.describe(u);

// Below will print [weight, name, age, class]
System.out.println(props.keySet());

Which means.. you can use BeanUtils to introspect your property names and do useful stuff .. eg: printing HTML table without even hardcoding the column

// Print headings
sb.append("");
for(String prop : props) {
  if(prop.equals("class")) continue; // we don't need the class name
  sb.append("" + prop + "");
}
sb.append("");

// Print rows
for(User u : users) {
  sb.append("");
  for(String prop : props)  {
    if(prop.equals("class")) continue; // we don't need the class name
    sb.append("" + BeanUtils.getProperty(u, prop) + "");
  }
  sb.append("");
}

And of course you have to take this further. Eg: on Spring MVC you can do similar thing: dump all the column name and values into your model object, and you can have a generic view that prints all sorts of domain object collection into a table.

How cool is that :).

Creating New Java EE 7 Maven Eclipse Project

Still on the Java EE 7 hype, here’s a quick cheat sheet on how to create a minimal Java EE 7 ready maven project:

  1. Ensure you have Eclipse Indigo installed with m2e (maven connector). If not you can drag and drop this logo into running Eclipse instance

    (thanks m2e team)
  2. Create new maven project, tick Create a simple project (skip archetype selection), on the next screen provide Group Id, Artifact Id, and set Packaging to war. Hit Finish
    new maven proj cut
  3. Open pom.xml, switch to source view. Add Java EE 7 dependency. Set the scope to provided so that it is included at compile time, but not on the war bundle (because it should be provided by container)
    
      4.0.0
      com.gerrytan
      jee7fiddle
      1.0
      war


          javax
          javaee-api
          7.0
          provided


  4. Tell Maven to compile using JDK 7, otherwise the deafault is JDK 5


            maven-compiler-plugin
            3.1
            
              1.7
              1.7


  5. And finally prevent maven-war-plugin from complaining because of missing web.xml. New Java EE 7 style provides good annotation support, web.xml can be omitted for a simple project
          
          
            maven-war-plugin
            2.3
            
              false


  6. Right click on the project -> Maven -> Update Project… -> OK. This will cause m2e to synchronize with all changes we made
  7. Test your new project by running clean package
    maven run cut
    You should end up with a war bundle with your project name under target directory

Working With Eclipse and Glassfish

With the new launch of Java EE 7, I felt the quickest way to get a taste of it is to use Glassfish (Java EE reference implementation). Here’s how to get started with Glassfish and Eclipse:

Eclipse GlassFish Setup

  1. Download and install JDK 7 if you haven’t done so.
    jdk download


  2. Ensure you have Eclipse installed. First we’ll add Glassfish runtime environment. On Eclipse, go to Preferences -> Server -> Runtime Environments -> Add and select Glassfish -> Glassfish 4.0 (Select Download additional server adapter if you can’t find it).

    eclipse glassfish 01

    Hit Next, select Java 7 runtime and glassfish directory (On windows this is normally C:glassfish4glassfish)

    glassfish eclipse setup 1

  3. Next, create a new Glassfish server. Ctrl+N (or Cmd+N on Mac) and select Server -> Server. Select server type GlassFish -> GlassFish 4.0. Accept all defaults and hit Finish. You should now have a Glassfish server on your Servers tab on eclipse:

    eclipse glassfish 2

  4. To test your server, select the Glassfish 4.0 Server from Eclipse server tab and right click -> Start. Glassfish server will output few messages to the console, and you can verify by opening http://localhost:8080 on your browser, you will see something like this:

    glassfish server running

    Right click the server -> Stop to stop the server.

Create New Glassfish Application Project

Now we have eclipse wired to Glassfish, we can begin coding the application.

  1. Create a new dynamic web project: Ctrl+N (or Cmd+N on Mac) -> Select Web -> Dynamic web project. Configure it like following:
    Screen Shot 2013-06-29 at 2.46.42 PM

    Accept all default (or configure if you need to) and hit Finish